How to Compress DJI Drone Footage Like a Pro
Everything drone pilots need to know about shrinking massive aerial video files while preserving cinematic quality, metadata, and flight telemetry data
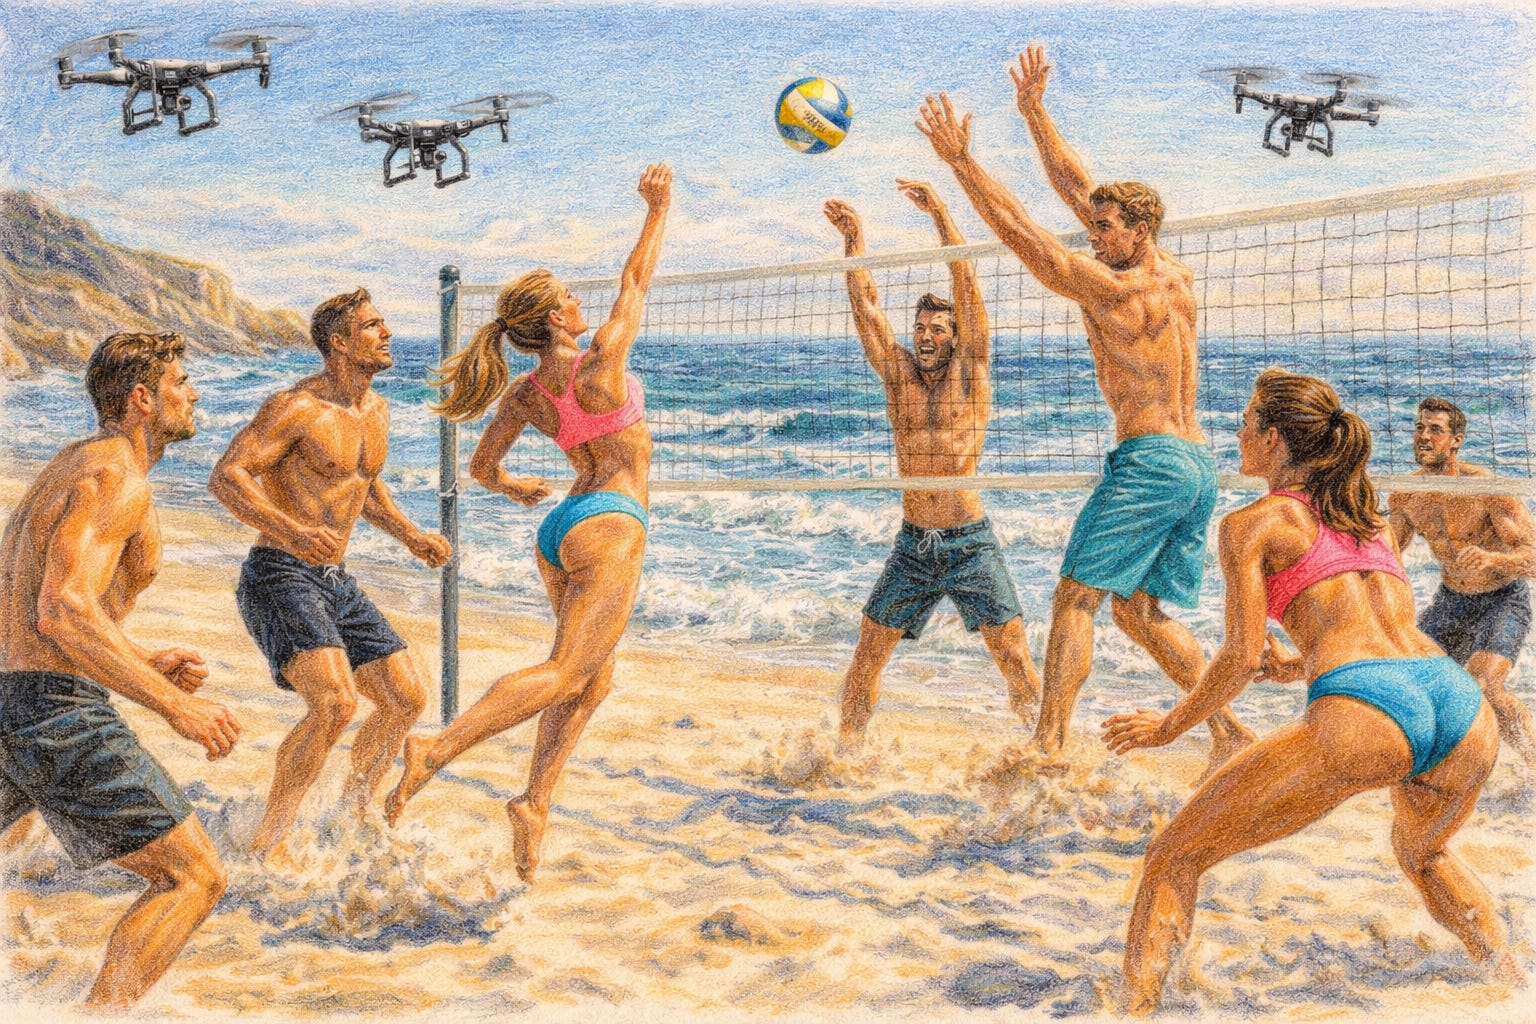
There is a specific version of this problem that every drone pilot encounters. You land after a flight session, pull the microSD card, and start transferring footage to your computer. The progress bar is going to be there for a while. A twenty-minute session with a DJI Air 3 or Mavic 3 in 4K at 60fps can easily produce eight to fifteen gigabytes of footage. A day of serious aerial cinematography with a DJI Inspire or Zenmuse X series shoots can fill a 256GB card.
The footage is stunning. Sweeping aerials, dramatic orbit shots, smooth reveal sequences. The files are also enormous, and the gap between “looks incredible” and “actually shareable” requires a compression step that most drone pilots either skip (and frustrate everyone they try to share footage with) or handle badly (and wonder why their compressed footage looks muddy and over-processed).
This guide covers everything a drone pilot needs to know about compressing DJI footage well: why DJI files are structured the way they are, what DJI’s various recording modes and color profiles mean for compression decisions, how to use ReportMedic’s DJI Video Compressor for browser-based compression that keeps your footage on your device, and how to handle the specialized concerns around aerial footage including SRT telemetry files, GPS coordinate privacy, and regulatory documentation requirements.
Why DJI Drone Footage Creates Enormous Files
DJI designs its cameras for professional-quality output, which means capturing footage at significantly higher bitrates and resolutions than necessary for direct delivery. Understanding the specific factors that make DJI files large explains why compression is so effective and what happens when you apply it.
4K and 5.4K Recording at High Bitrates
DJI’s consumer and prosumer drones record in 4K as a standard option across most of the lineup. The DJI Mavic 3 records at up to 5.1K, and the DJI Air 3 supports 4K at up to 100fps. Higher-end cameras like the Zenmuse series shoot at even greater resolutions.
The bitrates DJI uses reflect a commitment to capturing maximum quality:
DJI Mini 4 Pro at 4K 30fps: approximately 150 Mbps in 10-bit mode
DJI Air 3 at 4K 60fps: up to 150 Mbps
DJI Mavic 3 at 5.1K: up to 200 Mbps in D-Log M color profile
DJI Inspire 3 with Zenmuse X9: up to 8K RAW at over 1000 Mbps
Compare these bitrates to typical streaming delivery. A 4K YouTube stream uses approximately 15-25 Mbps. DJI’s 4K recording bitrates are six to twelve times higher than what YouTube delivers to viewers. Every bit of that extra data represents quality headroom for production workflows, but for direct sharing, it represents unnecessary file size.
D-Log and D-Cinelike Color Profiles
DJI cameras offer several color profiles, and the choice of color profile has significant implications for both file size and compression workflow.
D-Log (and its variants D-Log M on recent Mavic series cameras) is a logarithmic encoding designed for maximum dynamic range capture. D-Log footage appears flat, desaturated, and low-contrast until color grading is applied. The encoding curve compresses the tonal range to fit more dynamic range into the available bit depth. A scene that spans ten or more stops of exposure range can be captured in a usable form with D-Log where standard color modes would clip highlights or crush shadows.
D-Log footage is intended for professional color grading workflows, not for direct delivery. If you share D-Log footage without grading, viewers see washed-out, grey-looking video that appears to have a color problem.
D-Cinelike is DJI’s gentler flat color profile, with less extreme tonal compression than D-Log. It retains somewhat more natural-looking color and contrast while still providing additional dynamic range headroom compared to standard profiles. Some pilots use D-Cinelike as a middle ground when they want some grading flexibility without the full commitment to D-Log post-processing.
Normal / Standard color applies DJI’s in-camera processing to produce footage that looks correct immediately. Vibrant colors, natural contrast, no grading required. This is the right choice for footage going directly from camera to compressed delivery without editing.
The color profile affects compression workflow fundamentally: D-Log footage requires grading before compression for delivery. Standard footage can be compressed directly.
H.264 vs H.265 Codec Options
DJI cameras offer codec choices that vary by model and recording mode.
H.264 (AVC) is available on virtually all DJI camera products. It is broadly compatible with all playback systems and editing software. DJI’s H.264 recording uses standard profiles compatible with off-the-shelf decoders. The limitation is efficiency: H.264 requires higher bitrates than H.265 to achieve equivalent visual quality.
H.265 (HEVC) is available on DJI’s higher-end cameras, particularly for 4K and higher resolutions at high frame rates, and for 10-bit recording modes. H.265 achieves equivalent quality at roughly half the bitrate of H.264, which is why DJI uses it for the highest quality recording modes. The trade-off is encoding complexity and compatibility: some older editing systems and devices cannot decode H.265 without hardware support.
When compressing DJI footage, the source codec is usually either H.264 or H.265 depending on which recording mode was used. The output codec is your choice: H.264 for maximum compatibility, H.265 for better file size efficiency where device support is confirmed.
10-Bit Color Depth
DJI’s premium recording modes capture 10-bit color rather than the standard 8-bit. 10-bit color provides 1024 distinct values per channel compared to 256 for 8-bit, enabling smoother gradients, more subtle shadow and highlight detail, and better resistance to banding artifacts during color grading.
10-bit footage files are larger than 8-bit footage at equivalent resolution and frame rate. For delivery, 8-bit output is standard and adequate. The 10-bit source data provides quality headroom for color grading, which then delivers cleanly to 8-bit output.
DJI’s File Structure: Understanding What You Are Working With
DJI stores footage using a file naming and directory structure designed for its own workflow tools. Understanding this structure prevents confusion when managing footage for compression.
Video files: DJI_0001.MP4, DJI_0002.MP4, and so on, numbered sequentially across recording sessions.
SRT subtitle files: DJI_0001.SRT, DJI_0002.SRT, matching the corresponding video file. These contain frame-by-frame flight telemetry including GPS coordinates, altitude, horizontal and vertical speed, and camera settings. SRT files are plain-text files formatted as subtitle tracks, making the telemetry data human-readable and directly importable into subtitle-capable video players.
Thumbnail files: Some DJI products generate thumbnail images alongside video files for quick preview.
DCIM directory: DJI stores footage in the DCIM directory on the microSD card, within folders named by date (e.g., DCIM/100MEDIA). The date-based folder structure makes finding footage from a specific day straightforward.
When compressing DJI footage, the SRT files require separate consideration from the video files. Standard video compression produces an MP4 output without the SRT telemetry. If you need the telemetry data to remain accessible, keep the original SRT file alongside the compressed video, or embed the SRT as a subtitle track in the output MP4.
Slow Motion and Variable Frame Rate
DJI’s high-frame-rate recording modes (4K at 120fps on Mavic 3, for example) are used for slow-motion playback. A clip recorded at 120fps plays back at 4x slow motion when output at 30fps. The file size of a 120fps recording is four times that of the same duration at 30fps, because it contains four times as many frames.
When compressing slow-motion DJI footage, the output frame rate determines how the slow motion will play. If you want the slow-motion effect preserved, output at 30fps from the 120fps source. If you want the footage to play at normal speed, output at the original frame rate. The choice depends on the intended use.
DJI Recording Settings and Their File Size Implications
Every DJI camera setting that affects recording quality directly affects file size. Understanding the relationship helps you make informed decisions both at capture time and during compression.
Resolution Tiers and Storage Implications
At equivalent recording time, the relationship between resolution and file size is approximately proportional to pixel count:
Moving from 4K (3840x2160) to 1080p (1920x1080) reduces pixel count by a factor of four, which typically translates to 60-75% smaller file size at equivalent quality settings
Moving from 5.1K (5120x2700) to 4K reduces pixel count by approximately 40%, translating to 30-40% smaller files
For most drone footage shared via social platforms or sent to clients who will view it on screens smaller than 65 inches, 1080p is visually adequate. 4K is necessary for large-screen display, for footage that will be zoomed or cropped in post, and for professional delivery where the client expects 4K.
Frame Rate and Motion Quality
Standard drone footage at 24fps or 30fps looks cinematic and compresses efficiently. High-frame-rate recording at 60fps produces files approximately twice the size of 30fps footage and is used when smooth motion at playback speed is required, or as a source for 2x slow-motion.
120fps and 240fps recording (available at lower resolutions on some DJI cameras) produces files proportionally larger and is almost exclusively used for slow-motion effects. These files benefit dramatically from frame rate reduction during compression when the slow-motion effect is the intent.
Color Profile and Storage
Counterintuitively, D-Log footage does not necessarily produce larger files than Normal color footage at the same resolution and bitrate setting. The color profile affects the encoding curve rather than the data rate directly. At the same bitrate, D-Log footage is capturing a different distribution of tonal information, not more or less information than Normal color.
However, DJI often links its highest recording bitrates to D-Log modes. The DJI Mavic 3’s 200 Mbps recording mode is available in D-Log M but not necessarily in Normal color at the same resolution and frame rate. So in practice, choosing D-Log often means choosing a higher recording bitrate, which means larger files.
Hyperlapse Modes
DJI’s Hyperlapse modes (Free, Circle, Course Lock, Waypoints) capture footage with automatic exposure management for time-lapse sequences. The output is typically a stabilized video file at the selected resolution. Hyperlapse files vary significantly in size depending on capture interval and session duration.
For most hyperlapse sequences, 1080p output is adequate at delivery. The time-compression effect of hyperlapse means the final video is a fraction of the duration of the raw capture session, so file sizes are inherently more manageable than continuous recording footage of equivalent session time.
Compression Strategies Specific to Aerial Footage
Aerial footage has visual characteristics that require specific consideration during compression. Understanding these characteristics helps you avoid the most common aerial compression mistakes.
Preserving Wide Dynamic Range
DJI’s D-Log color profiles capture wide dynamic range scenes where both bright sky and shadowed ground detail are visible simultaneously. This is one of the most compelling visual aspects of drone footage: the ability to see both the sun-lit horizon and the shadow detail of buildings or terrain in the same frame without one or the other being blown out or crushed.
Standard color mode footage (where the camera has already processed the tonal range) preserves this quality to the extent the in-camera algorithm allows. D-Log footage preserves the maximum possible dynamic range, requiring color grading to reveal it.
For compression, wide dynamic range aerial footage needs adequate bitrate to encode the tonal variation across the wide luminance range. Footage with extreme dynamic range (golden hour flights, flights near reflective water surfaces, indoor-to-outdoor transitions) is particularly demanding. At insufficient bitrate, the smooth tonal gradations in the sky turn into banding (visible steps between tonal values) and the shadow areas lose subtle detail.
Horizon-to-Horizon Detail
Drone footage frequently features sweeping wide-angle or medium shots where the entire frame contains continuous ground texture from foreground to horizon. Agricultural fields, urban grids, coastlines, and mountain terrain all create high spatial frequency content across the entire frame rather than in specific focal-point areas.
This is unlike typical ground-level camera footage where a main subject occupies the center of frame and background compression artifacts are less visible. In an aerial master shot, every area of the frame receives equal viewer scrutiny. Compression artifacts in the upper third of the frame (distant fields, city grid) are just as visible as artifacts near the center.
For aerial master shots and wide coverage shots, using adequate quality settings is important precisely because there is no “background” to hide compression artifacts. Everything in the frame is subject matter.
Handling Orbit and Rotation Shots
Orbit shots (where the drone circles a subject while maintaining the camera pointed at it) and rotation shots (the drone spins in place) produce footage where the entire background changes continuously. These shots create very high temporal complexity: every frame is substantially different from the preceding frame because the entire background is in motion.
High temporal complexity means standard inter-frame compression (encoding only the differences between frames) has less to work with. More data is needed per frame because fewer components are consistent across frames. For orbit and flyover shots with continuous background motion, moderate quality settings may not be adequate. Preview compressed orbit shots carefully before finalizing settings.
Static Hover Shots vs Motion Shots
A drone hovering stationary over a subject (stabilized gimbal, no drone movement) produces footage with very low temporal complexity: the background changes only with wind sway or subject movement. This type of footage compresses extremely efficiently.
The same drone in a fast, low pass over terrain produces the opposite: maximum temporal complexity. Both shot types may appear in the same project and benefit from different approaches if you are compressing individual clips rather than a full edit.
Rolling Shutter and Compression
DJI cameras use CMOS image sensors that read out line by line rather than capturing the entire frame simultaneously (this is called a rolling shutter). When the drone or camera moves quickly, rolling shutter creates a jello or skew effect in footage. Compression algorithms interact with rolling shutter artifacts: the skewed lines and wobble add spatial and temporal complexity that increases data requirements.
Footage with significant rolling shutter artifacts compresses less efficiently than clean, non-distorted footage. Electronic image stabilization and post-processing stabilization both reduce rolling shutter, which also improves compression efficiency for the stabilized output.
Detailed Walkthrough: ReportMedic’s DJI Video Compressor
ReportMedic’s DJI Video Compressor is purpose-built for DJI drone footage with awareness of DJI’s specific file formats, recording modes, and the specialized needs of aerial videography. All processing happens locally in your browser. Your footage, including any embedded GPS data, never leaves your device.
Navigating to the Tool
Open reportmedic.org/tools/dji-video-compressor.html in any modern browser. The tool requires no installation, no account creation, and no payment. It works on Windows, macOS, Linux, and Chromebooks.
Loading a DJI Video File
Drag your DJI MP4 file into the designated drop zone or click to browse and select it. The tool accepts DJI footage in both H.264 and H.265 encoding formats. After loading, the tool displays the file’s metadata: resolution, frame rate, duration, file size, and codec. This baseline information helps calibrate your compression target.
For DJI footage recorded in D-Log or D-Cinelike color profiles, note that the flat color appearance in the loaded file is not an error. It reflects the intentional flat encoding of the color profile. If you want the delivered output to look normal without color grading, change the recording color profile in the DJI camera to Normal or Standard before future sessions. For footage already recorded in a flat profile, the options are: color grade before compression (using editing software), or compress in flat profile and accept that the output will look desaturated until graded.
Selecting Output Resolution
The resolution selector offers options from the original resolution down through 4K, 1080p, 720p, and lower. The appropriate choice depends on intended use:
Original resolution output - No resolution reduction, only bitrate reduction. Maximum visual fidelity for the output resolution. Appropriate for archival and professional client delivery.
4K output from 5.1K or higher source - Preserves high resolution for large-screen viewing, YouTube upload, and professional use while reducing file size from the very large 5.1K source files.
1080p output - The most common choice for social media, web delivery, email sharing, and general distribution. Dramatically reduces file size compared to 4K source while maintaining excellent visual quality at typical viewing sizes.
720p output - Appropriate for mobile-first viewing, messaging app sharing, and situations where file size must be minimized.
Quality Settings and What They Mean for Aerial Footage
The quality slider controls how much data the encoder allocates to the compressed output. For DJI aerial footage specifically, consider these guidelines by content type:
Slow, smooth aerial shots (creep shots, hover footage, slow orbits): Can use medium quality settings. Low temporal complexity means the encoder can maintain good visual quality with moderate data allocation.
Fast passes, rapid sweeps, dynamic low-altitude footage: Requires medium-high quality settings. High temporal complexity demands more data to encode cleanly.
Sunrise and sunset golden hour footage: Requires medium-high to high quality settings. The wide dynamic range and subtle sky gradient variations are easily damaged by insufficient bitrate.
Coastal and water footage: Requires medium-high quality settings. Fine water surface detail and the reflective, variable texture of water is expensive to encode and shows compression artifacts easily.
Urban grid and architectural footage: Medium quality is often adequate for standard delivery. Regular geometric patterns compress more efficiently than complex natural textures.
Processing and Output
After confirming your settings, processing begins locally. DJI files are typically large (multiple gigabytes for longer sessions), and processing time reflects the file size and your device’s processing capability. A five-minute 4K DJI clip typically processes in three to ten minutes on a modern laptop or desktop.
When processing completes, the output file is available for download. Verify the file size meets your target and open it to preview quality in the most visually complex sections of the footage.
Handling the SRT Telemetry File
When you compress a DJI video file, the companion SRT file (containing GPS, altitude, and speed data) requires separate handling. The compressed MP4 output does not include the SRT data automatically.
Options for managing the SRT alongside compressed footage:
Keep both files together: Name and store the compressed MP4 and original SRT file in the same folder. Any software or workflow that reads DJI SRT data will find it alongside the compressed video.
Embed SRT as subtitle track: Some video players and editing tools support reading SRT as a burned-in or soft subtitle overlay. Keeping the SRT as a separate file maintains maximum flexibility.
Discard SRT if telemetry is irrelevant: For footage shared purely as cinematic content where flight data is not needed, the SRT can be disregarded.
For professional use cases where telemetry documentation is important, maintaining the SRT file is essential.
Preserving DJI SRT Subtitle Files and Flight Telemetry
SRT files from DJI drones contain substantially more information than typical subtitle files. Understanding what they contain and when to preserve them is important for professional drone workflows.
What DJI SRT Files Contain
A DJI SRT file is a plain-text file structured as a standard subtitle format. Each entry corresponds to a specific frame or time range in the video and contains:
Timestamp: The video timecode the data corresponds to
GPS coordinates: Latitude and longitude in decimal degrees
Altitude: Height above sea level and above takeoff point (relative altitude)
Speed: Horizontal speed and vertical speed in meters per second or kilometers per hour depending on settings
Camera settings: ISO, shutter speed, EV compensation, color mode, focal length
Signal strength: RC signal quality
Satellite count: Number of GPS satellites locked at the time of recording
This data is recorded at the video frame rate, providing second-by-second flight telemetry synchronized to the visual content.
Professional Uses for SRT Telemetry
Real estate and surveying: Property surveys, boundary documentation, and site assessment footage with embedded altitude and position data creates a more complete documentation record than video alone.
Insurance documentation: Property damage assessment, vehicle accident documentation, and event coverage from a drone carries evidentiary weight when GPS-verified position and altitude data accompanies the visual record.
Agricultural and infrastructure inspection: Pipeline inspection, power line patrol, and crop assessment footage is more useful when paired with GPS track data that identifies the specific location being shown at each moment.
Construction progress documentation: Time-series aerial documentation of a construction project is more valuable when each session’s footage includes GPS-verified position data confirming the camera was in the same position for each comparison shot.
Search and rescue support: Public safety drone operations benefit from footage with precise GPS coordinates that can be cross-referenced with maps and other data sources.
Regulatory compliance: In jurisdictions where flight records must be maintained (commercial drone operations under Part 107 in the US, for example), SRT files provide video-synced flight records that support compliance documentation.
When SRT Data Is Less Critical
For creative and entertainment drone content, landscape and travel photography, social media content, and personal projects where flight data carries no analytical or legal value, the SRT file can be disregarded without consequence.
Understanding DJI’s Codec Pipeline End to End
Every piece of DJI footage passes through a specific technical pipeline between the moment the sensor captures light and the moment a compressed delivery file reaches its audience. Understanding each stage explains where quality is created, preserved, and where it can be lost.
The Sensor and ISP
DJI camera sensors capture raw light data at the hardware level. This raw data immediately passes through the Image Signal Processor (ISP), which applies demosaicing (converting raw Bayer pattern data to full-color pixels), noise reduction, color science, and the selected color profile encoding. The ISP processes at the sensor’s native resolution and frame rate in real time.
The color profile selection at this stage determines the entire downstream character of the footage. D-Log applies a logarithmic encoding curve, compressing the tonal range to preserve maximum dynamic range. Standard color applies DJI’s proprietary tone-mapping algorithm, which makes in-camera decisions about highlight and shadow handling that cannot be recovered in post.
In-Camera Encoding
After ISP processing, the video stream is passed to the camera’s hardware encoder. DJI cameras use dedicated video encoding hardware that applies H.264 or H.265 compression in real time. The encoder is highly capable but constrained by its design objectives: it must run continuously, produce output immediately, and maintain stable performance across a wide range of environmental conditions.
The resulting file is high-quality by consumer and prosumer standards but is deliberately overbuilt for delivery. The bitrate margin is intentional, providing quality headroom for subsequent editing, grading, and compression steps.
Transfer to Storage
Footage moves from the camera’s buffer to the microSD card or, on some DJI products, internal storage. This transfer does not modify the footage in any way. The only risks at this stage are write speed limitations (causing dropped frames if the card is too slow) and physical card handling errors.
Post-Production and Compression
The compression step, where ReportMedic’s DJI Video Compressor operates, is the first deliberate modification of the footage after capture. The encoder decodes each frame of the source file, applies the selected resolution and quality settings, and re-encodes to the output format. Quality decisions made here are permanent.
Platform Re-encoding
If the compressed file is subsequently uploaded to a platform that re-encodes content (YouTube, Instagram, TikTok, Vimeo), an additional compression stage occurs. The final quality received by viewers reflects the cumulative effect of all compression stages. Uploading a clean, spec-aligned compressed file minimizes the degradation introduced by platform re-encoding.
Why Aerial Footage Compresses Differently Than Ground-Level Video
Drone footage has a fundamentally different visual structure than video shot from a stationary or hand-held ground-level camera. These structural differences directly affect how compression algorithms perform and where artifacts appear.
The Absence of Depth of Field
Ground-level cinematography frequently uses shallow depth of field to separate subjects from backgrounds. Blurry backgrounds require far less bitrate to encode than sharp backgrounds because blur destroys the high-frequency detail that encoders must work hard to preserve.
Drone footage almost universally uses deep depth of field. The small sensor size and typical altitude of most drone shots means everything in the frame is in sharp focus from near ground to distant horizon. Sharp detail throughout the entire frame is visually compelling but compression-expensive. There is no blurry background to encode cheaply.
The Constantly Changing Background Problem
When a ground-level camera records an interview, the background might be a wall, a bookshelf, or a garden that stays essentially the same frame after frame. The encoder can exploit this temporal redundancy, encoding background areas efficiently because they barely change.
In drone footage, the background is the primary subject. As the drone moves forward, the entire ground below the drone scrolls through the frame. As the drone rotates, the background sweeps. Even in a slow, stable flight, the ground texture below is in continuous motion. This eliminates the temporal redundancy that makes many video types compress efficiently, requiring the encoder to treat most frames as highly novel rather than incremental changes from the previous frame.
Sky and Gradient Compression
Sky regions in drone footage are often visually simple (gradients from light blue to darker blue, or sunset oranges and pinks) but technically demanding to compress without banding. Gradient regions are sensitive to quantization errors: when the encoder reduces precision in the color channel, smooth gradients develop visible stepped transitions called banding.
Sky banding in compressed drone footage is a common artifact of insufficient bitrate. The smooth sky gradient that looks beautiful in the original becomes a series of visible tonal bands in the compressed output when the bitrate is too low to maintain fine gradational precision.
Addressing sky banding requires either higher quality settings (more bitrate allocated to preserve gradient smoothness) or applying a subtle dithering filter during color grading that breaks up potential banding patterns before compression.
Atmospheric Haze and Visibility
Drone footage frequently involves distant views where atmospheric haze creates subtle tonal variation across the image. This haze is a feature of the aerial perspective, not a flaw, and it creates a complex, low-contrast, high-frequency tonal structure in distant areas of the frame.
Compression algorithms tend to underperform in hazy distant areas of aerial footage, introducing an artificial sharpening or blocking effect that destroys the subtle atmospheric character. Adequate bitrate preserves the haze as a smooth tonal quality. Insufficient bitrate turns it into visible noise or blocking in the distance.
Advanced Technical Considerations for DJI Compression
10-Bit vs 8-Bit Workflow Implications
DJI cameras that support 10-bit recording capture four times as many distinct tonal values per channel as 8-bit recording. The practical benefit is primarily in color grading: 10-bit footage tolerates more aggressive color manipulation without posterization or banding. For footage going through significant color grading, 10-bit is a meaningful advantage.
For delivery, 8-bit output is the standard. All major streaming platforms and most playback systems assume 8-bit color depth. Delivering 10-bit compressed files is technically possible but unnecessary for most use cases and may cause compatibility issues with some players.
The compression workflow for 10-bit DJI footage: retain the 10-bit source for color grading, grade in 10-bit color space, export graded output at 8-bit for delivery compression. The transition from 10-bit to 8-bit at the final export stage, after grading is complete, produces better results than converting to 8-bit before grading.
Variable Frame Rate Footage
Some DJI cameras can record Variable Frame Rate (VFR) video, where the frame rate changes within a single clip. This is used for creating seamless transitions between normal-speed and slow-motion sections within a single continuous recording. VFR footage requires specific handling during compression because standard encoders assume a constant frame rate throughout the file.
Compressing VFR footage with a tool that treats it as constant frame rate can produce playback timing errors. Verify that your compression tool handles variable frame rate content correctly if you use VFR recording modes.
CineSmooth and Stabilization Interaction with Compression
DJI’s electronic stabilization systems (EIS, RockSteady, HorizonSteady) apply digital cropping and frame shifting to compensate for drone movement. Stabilized footage often looks smoother than unstabilized footage, which affects compression efficiency in two ways: the smoother motion reduces temporal complexity (helping compression), but the digital crop may reduce effective resolution (reducing the benefit of high-resolution recording).
For DJI footage that was recorded with stabilization active, expect somewhat better compression results than unstabilized footage of equivalent resolution and frame rate, because the reduced shake produces more consistent frame-to-frame content that encoders can exploit for temporal compression efficiency.
HDR Drone Footage
DJI’s newer cameras support HDR recording in some modes. HDR (High Dynamic Range) video uses a specific encoding standard (typically HLG - Hybrid Log-Gamma - for consumer HDR) that preserves wider dynamic range than standard dynamic range video. HDR footage requires HDR-compatible displays and players to look correct.
For most sharing and delivery workflows, converting HDR source footage to standard dynamic range (SDR) during color grading or compression is the practical approach. HDR displays are not yet universal, and HDR content that appears on an SDR display often looks washed out or incorrectly exposed without proper tone-mapping.
Compressing HDR footage for HDR delivery requires careful workflow management to preserve the HDR metadata. For standard delivery, convert to SDR.
DJI-Specific Compression Challenges and Solutions
The Multi-Segment Flight Challenge
Complex flight missions, particularly automated Waypoints missions and active-track sequences, can produce footage where the character changes dramatically between segments: fast approach at altitude, slow orbit, hover, rapid descent, close-up tracking shot. Each segment has different compression requirements.
If you compress the entire flight as a single file, the quality settings must accommodate the most demanding segment (typically the fast approach or rapid motion sections). This may result in excessive bitrate for the simpler hover and slow-orbit segments.
For more efficient compression of complex multi-segment flights, consider using ReportMedic’s Split Video tool to divide the flight at the transition points, then compress each segment with settings appropriate to its content. The hover segments can use lower quality settings (and produce smaller files) while the high-motion segments get the bitrate they need.
The Sunset and Golden Hour Special Case
Golden hour and sunset drone footage is among the most visually spectacular content drones can capture. It is also among the most technically demanding to compress well. The specific challenges:
Rapidly changing light: As the sun approaches and crosses the horizon, lighting conditions change fast. The encoder must continuously adapt to significant frame-by-frame luminance changes, which increases temporal complexity.
Wide dynamic range scenes: Sun near the horizon creates extreme contrast between the bright sky near the sun and the shadowed landscape below. Standard color mode footage clips highlights in these scenes unless the camera exposure is carefully managed. D-Log preserves the full dynamic range but requires grading.
Warm orange and amber tones: Sunset color palettes create high chroma content in the warm orange to red range. These colors can develop subtle saturation banding when compressed at insufficient bitrate.
For golden hour footage, use D-Log if available for maximum dynamic range preservation, grade carefully before compression, and apply medium-high to high quality settings during compression. The visual investment is worth protecting with adequate bitrate.
Night Flying Footage
Night flying footage from drone cameras faces similar challenges to GoPro low-light footage: high ISO increases sensor noise, noise is expensive to encode, and the result of insufficient bitrate is blocking artifacts that look worse than clean noise.
DJI’s newer cameras handle night flying reasonably well at their native exposure, but the footage always has more noise than daylight shots. For night footage:
Accept larger compressed files as the cost of preserving clean-looking noise
Apply noise reduction in color grading before compression if available
Set quality to high rather than medium
Avoid further reducing resolution below 1080p unless file size is critically constrained
The Privacy Case for Local Compression of Drone Footage
The privacy argument for browser-based local compression is stronger for drone footage than for almost any other video type. DJI footage is uniquely sensitive in ways that are worth understanding explicitly.
GPS Tracks as Location Records
Every DJI video file, when accompanied by its SRT file, contains a complete GPS track of the flight. This track identifies:
The precise takeoff location (which is typically your vehicle, your home, or a specific entry point to a location)
Every location the drone flew over
The altitude profile of the entire flight
The speed and direction of travel throughout
If you upload DJI footage to a cloud compression service, you are transmitting this GPS track data to a third-party server. For most content, this is low-stakes. For sensitive operations (commercial property surveys, private estate coverage, restricted area documentation, personal home flights), the GPS data reveals location information you may prefer to keep on your own devices.
Aerial Photography of Private Property
Drone cameras capture visual documentation of private property from above. Real estate listings, residential neighborhoods, agricultural operations, commercial facilities, and institutional campuses may all appear in drone footage. Uploading this footage to a third-party compression service means transferring visual documentation of private property to a server you do not control.
Browser-based processing via ReportMedic’s DJI Video Compressor ensures this visual content stays on your device throughout the compression process. The footage is never transmitted, stored, or processed by any external server.
Corporate and Client Confidentiality
Professional drone operators frequently film for corporate clients, real estate developers, construction firms, and other organizations that have confidentiality interests in their operations and properties. Uploading client footage to a third-party cloud service without the client’s knowledge or consent may violate client agreements.
Using a local browser-based compression tool ensures client footage is processed without leaving your device, consistent with professional confidentiality obligations.
Comparing DJI Footage Quality Across Compression Levels
A practical understanding of what compressed DJI footage looks like at different quality levels helps calibrate your compression decisions.
High Quality Setting
At high quality settings, compressed DJI footage is essentially indistinguishable from the original at typical viewing distances on standard displays. Fine grain in the sky, subtle ground texture detail, smooth gradient transitions, and sharp geometric lines in urban footage all appear clean. The file size reduction from original bitrate to high-quality compressed output is significant (typically 50-80%) without perceptible quality loss.
Medium Quality Setting
At medium quality settings, subtle differences from the original may be visible to an attentive viewer examining the footage closely, particularly in:
Fine texture detail in complex ground surfaces at high zoom
Sky gradients in scenes with subtle tonal variation
Fine architectural detail in distant structures
At typical social media viewing distances and on phone or tablet screens, medium quality is generally indistinguishable from high quality. For content that will be displayed on large screens or examined carefully, medium quality may not be sufficient.
Low Quality Setting
At low quality settings, compression artifacts become visible in a range of areas: sky banding, ground texture blocking, edge artifacts in architectural footage, and smearing of fine detail in foliage and vegetation. For footage that will be watched critically or professionally, low quality settings are not appropriate. For footage where only general visual impression matters (rough reference, quick preview), low quality compresses aggressively while maintaining sufficient intelligibility.
Comparison of Compression Approaches for DJI Footage
Browser-Based: ReportMedic DJI Video Compressor
ReportMedic’s DJI Video Compressor is the right choice when privacy is paramount (drone footage contains GPS coordinates of properties and locations), when you prefer not to install additional software, and when you need a consistent cross-platform workflow.
The privacy argument for browser-based, local processing is especially compelling for drone footage. DJI video files contain precise GPS coordinates of every location the drone flew over, the altitude and speed at every moment, and high-resolution visual documentation of private properties and restricted areas in many cases. Uploading this footage to a cloud-based compression service means transferring all of this location and visual data to a third-party server. Local browser processing eliminates this transfer entirely.
DJI Fly App Export
The DJI Fly app (mobile) includes basic editing and sharing features that allow exporting compressed versions directly from the device. For pilots who prefer to handle compression on their phone immediately after landing, this is convenient.
The trade-off is limited control. The DJI Fly app offers minimal compression customization compared to dedicated compression tools. Output quality and file size are less predictable. For simple social sharing where convenience outweighs control, Fly app export is adequate.
DaVinci Resolve
DaVinci Resolve is the professional choice when drone footage is part of a color grading workflow. D-Log footage particularly benefits from Resolve’s professional color science tools. After grading and editing in Resolve, the output is exported at delivery specs.
DaVinci Resolve is a complete non-linear editor and color grading suite. Its complexity is appropriate when the project requires dedicated color work. For simple compression tasks without editing or grading, Resolve is significant overkill.
Adobe Premiere Proxy Workflows
For editors who work in Premiere Pro, creating proxy files from DJI footage is standard practice. The proxy workflow involves creating low-resolution copies for editing speed, then reconnecting to original files for final export. Premiere’s Media Encoder handles the compression step at export.
This workflow is excellent for professional production. For drone pilots who just need to compress footage for sharing without a full editing workflow, Premiere’s complexity and subscription cost are not justified.
HandBrake
HandBrake provides precise compression controls with GPU-accelerated processing for high throughput. For batch compression of large numbers of DJI files, HandBrake’s batch queue is more efficient than processing files one by one in a browser tool. The trade-off is installation, some configuration, and no local-only privacy guarantee (though HandBrake itself is a local desktop application and does not upload files).
FFmpeg
FFmpeg handles every aspect of DJI video compression with maximum control. Scripts can automate batch processing of entire card contents, apply consistent settings across all files, and integrate with broader post-processing workflows. FFmpeg requires command-line fluency and is the appropriate choice for technically advanced pilots managing large-scale footage workflows.
For the majority of drone pilots, ReportMedic’s DJI Video Compressor provides the best combination of capability, convenience, and privacy without requiring any installation or technical knowledge.
Use Case Compression Guides
Professional Cinematographers Delivering to Clients
Client delivery is the highest-stakes compression scenario. Quality expectations are explicit, format requirements may be contractually specified, and delivering inadequate quality has real professional consequences.
Before compressing any client deliverable, confirm format specifications: resolution, codec, color space, frame rate, audio format, and naming conventions. When specifications are not provided, default to: 4K H.264 MP4 at high quality settings, 30fps (or match source frame rate), AAC audio at 192 Kbps, Standard or client-specified color profile (never deliver D-Log without agreement that the client will handle grading).
For projects involving D-Log footage, complete color grading before compressing the delivery. Export a graded master from your editing or grading software, then compress the graded master. Never deliver flat D-Log footage as a final product unless specifically requested by a client who will do their own grading.
Maintain original uncompressed files until the client confirms delivery acceptance. Do not delete source footage until the project is fully closed.
Real Estate Aerial Photography and Virtual Tours
Real estate aerial footage faces specific requirements: property detail must be clear (potential buyers look carefully at roof conditions, landscaping, adjacent properties), color accuracy matters (footage that looks orange or green creates misleading impressions), and file sizes must be manageable for embedding in listing platforms.
Compress real estate aerial footage to 1080p H.264 at medium-high quality. Color-correct footage before compression to ensure accurate color representation. Pay particular attention to the property’s roof and exterior surfaces during quality review, as these are exactly what real estate clients scrutinize.
For virtual tour platforms that accept video, check the platform’s specifications. Many virtual tour tools accept standard MP4 at 1080p. Some require specific aspect ratios or resolutions for 360 or panoramic presentations.
The GPS privacy dimension is worth noting for real estate drone footage: coordinates embedded in DJI SRT files precisely identify the property location. For footage shared publicly (on listing websites, for example), the GPS data is revealing but not especially sensitive since the property is already publicly listed. For footage of properties that are not publicly listed, SRT data should be handled with the same care as any sensitive location information.
Construction Progress Documentation and Site Surveys
Construction documentation requires footage that will be compared across multiple sessions: the same angles shot weekly or monthly over a project timeline. Consistent compression settings across all sessions are important so that visual comparison is not complicated by differences in compression quality.
Document your compression settings for a project and apply them consistently. Any time you change settings, note the change in your project log. Ideally, use the same tool and the same quality level for all documentation sessions on a single project.
Compress construction documentation footage to 1080p H.264 at medium-high quality. This provides clear detail for architectural review while keeping files manageable for archiving across a long project timeline. Keep SRT files alongside all sessions if project documentation standards require flight records.
Agricultural and Land Survey Documentation
Agricultural drone surveys often involve large volumes of footage from systematic grid patterns over fields. The footage is primarily analytical rather than cinematic: what matters is visibility of crop conditions, field boundaries, and soil variations rather than visual aesthetics.
For analytical agricultural footage, 1080p at medium quality is adequate. The information content (crop health indicators, field variation) is visible at this resolution and quality. Compressing aggressively saves significant storage space for large survey operations that might generate hours of footage from a single field survey.
For footage that will be used in mapping software or orthomosaic processing, note that this typically involves still photos rather than video. Video from surveys is documentation of the flight rather than mapping source material.
Search and Rescue and Public Safety Applications
Public safety drone footage has unique requirements that may involve legal or regulatory constraints on compression and storage. Consult with your agency’s legal and compliance requirements before establishing a compression workflow for public safety footage.
In general, public safety footage should be compressed at high quality settings to preserve maximum detail for evidentiary or operational review. Original uncompressed files should be archived separately and maintained according to the agency’s records retention policy. SRT telemetry data should be preserved as part of the flight record.
Hobbyist Travel Vlogs and Social Media Sharing
Travel vlog drone footage is some of the most widely shared DJI content: sweeping aerials over landmarks, coastlines, mountains, and cities. The audience views it on phones, tablets, and desktop browsers. 1080p at medium quality is fully adequate for this use case and keeps file sizes manageable for platform upload.
For YouTube travel content, matching YouTube’s recommended specs (1080p or 4K H.264 at YouTube-specified bitrates) produces the best results after YouTube’s re-encoding step. For Instagram Reels and TikTok, 1080p vertical or square crop is standard.
Color grading before compression is important for travel footage: flat D-Log footage shared on social media without grading creates a poor impression and obscures the visual quality the drone captured.
Insurance Documentation and Roof Inspections
Drone footage used for insurance documentation and roof inspection carries direct liability and claim implications. Quality and format standards for this use case should align with the requirements of the insurance company or inspection client.
In the absence of specific requirements, compress to 1080p H.264 at high quality. Preserve SRT files with all documentation footage. Maintain original uncompressed files until the claim or inspection is formally closed and all deliverables are accepted. Do not aggressively compress footage that may need to be reviewed at the pixel level to identify property damage details.
Wedding and Event Aerial Coverage
Wedding and event aerial footage will be watched repeatedly by clients and family members for years. This is sentimental footage with high personal value. Compress at 1080p or 4K (depending on client expectations) at high quality settings. Color-correct before compression to ensure the footage looks its best.
For delivery to wedding clients, H.264 MP4 is the safest format choice: it plays on every device the client might own now or in the future, including devices they have not yet purchased. H.265 provides better storage efficiency but introduces compatibility risk with older family members’ devices.
Batch Workflow for Compressing an Entire DJI Memory Card
A full day of drone filming can produce fifty to a hundred individual video clips across multiple flights. Managing this volume efficiently requires a systematic batch workflow.
Step 1: Transfer and Organize
Transfer all footage from the microSD card to permanent storage. Create a folder structure that groups clips by flight session and date. Keep SRT files alongside their corresponding video files. Do not format the card until you have verified all files transferred correctly.
Step 2: Review and Triage
Before compressing everything, do a quick review pass. Play the first and last five seconds of each clip to identify: clips that are worth keeping, clips that can be discarded (takeoff, landing, incorrect framing, testing shots), and clips that require special handling (D-Log footage that needs grading, high-frame-rate footage intended for slow-motion).
This triage step prevents wasting compression time on footage you will never use. A day of filming might produce a hundred clips, of which thirty or forty are genuinely worth compressing and archiving.
Step 3: Handle Color Profile Clips Separately
Separate D-Log and D-Cinelike clips from Standard color clips. D-Log clips need color grading before delivery compression. They can be compressed at high quality for intermediate archival storage, but their delivery copies require a color grading step. Standard color clips can be compressed directly for delivery.
Step 4: Process in Batches by Use Case
Group clips by compression target:
Social media clips: 1080p, medium quality, small files
Client deliverables: 4K or 1080p at high quality
Personal archive: 4K H.265 at high quality
Proxy files for editing: 720p at high quality
Using ReportMedic’s DJI Video Compressor, process each clip according to its group settings. The browser tool processes files individually, making this systematic approach practical for batches of ten to thirty clips.
For very large batches (fifty or more clips), desktop tools with batch queue functionality (HandBrake or FFmpeg) provide better throughput. The choice between browser-based and desktop batch processing is a trade-off between the privacy and convenience of browser-based processing and the speed and automation of desktop batch tools.
Step 5: Organize Output Files
Name compressed files with a system that links each to its source. A convention like DJI_0001_compressed_1080p.mp4 alongside the original DJI_0001.MP4 and DJI_0001.SRT makes the relationship clear and keeps the archive navigable.
Create a simple log of session date, clip count, total raw size, total compressed size, and compression settings used. This log supports storage planning and provides a reference for applying consistent settings to future sessions from the same project.
Storage Architecture for Drone Pilots
Active drone pilots accumulate footage at rates that require deliberate storage planning. Without a system, storage becomes a recurring emergency.
Estimating Your Footage Volume
At 150 Mbps (a common DJI 4K recording bitrate), one hour of raw footage produces approximately 67GB. A drone pilot flying three hours per week generates approximately 200GB of raw footage per week, or roughly 10TB per year.
At compressed delivery specs (1080p H.264 at 5-8 Mbps), the same three hours of weekly footage compresses to approximately 6-11GB per week, or 300-570GB per year.
The storage implications are substantial. Without compression, a year of active flying requires multi-terabyte raw storage. With compression, the footprint drops by a factor of fifteen to twenty.
The Tiered Archive Model
Active card storage (microSD): Temporary. All footage migrated to permanent storage within 24-48 hours of recording.
Raw archive (external drive or NAS): Original uncompressed DJI files. Never modified. Organized by date and project. Backed up to a second location.
Compressed working copies (same drive or secondary drive): Compressed versions for delivery, sharing, and editing. Can be recreated from raw archive at any time if deleted.
Cold storage archive (for older footage): Footage more than one year old that is unlikely to be needed immediately can be moved to lower-cost cold storage (cloud archive services or a drive stored offline) to free up space on primary storage.
microSD Card Best Practices
Use cards rated for the bitrate your drone records at. DJI specifies minimum card speed ratings for each recording mode. Using a card slower than the minimum rated speed for a recording mode can cause dropped frames or recording failures. Current DJI cameras recording at high bitrates typically require V30 or V60 rated cards (indicating the minimum write speed in megabytes per second).
Format cards in the drone’s camera system, not on a computer. In-camera formatting ensures the directory structure and filesystem are correctly initialized for the drone’s recording workflow.
Keep multiple cards for extended shoots. Running one card until it fills and then inserting a second is more reliable than trying to manage space mid-session.
Regulatory and Legal Considerations for Drone Footage Storage and Sharing
Drone operations in most jurisdictions are subject to aviation regulations that create specific obligations around records, footage, and identification. While this guide covers these topics at a general level, always consult current local regulations and, where relevant, legal counsel.
Flight Records and Documentation
Commercial drone operators in many jurisdictions are required to maintain flight records. The specific requirements vary by jurisdiction and license type. In the US, Part 107 commercial drone operators must maintain logbooks and, for certain operations, obtain waivers or authorizations. DJI SRT files, when preserved, provide a form of electronic flight log tied directly to video documentation.
Maintaining original SRT files alongside compressed footage supports compliance documentation by providing timestamped GPS track data for each recorded flight.
Footage of Private Property
Drone cameras capture imagery of private property, sometimes incidentally (overflying a neighborhood to reach a filming location) and sometimes intentionally (real estate, inspection, journalism). Regulations around recording and distributing aerial imagery of private property vary significantly by jurisdiction.
When sharing drone footage publicly, review whether the footage shows private property in ways that might be subject to privacy or trespass concerns in your jurisdiction. This is a separate consideration from the technical compression workflow but is directly relevant to how compressed footage is distributed.
Export and Compression for Legal Evidence
If drone footage may be used as legal evidence (documenting an incident, property dispute, or insurance claim), consult with legal counsel before compressing or modifying the original files. Many legal contexts require that original, unmodified files be preserved and that any compressed copies be clearly documented as derivatives.
Creating compressed copies for presentation purposes while maintaining original files is standard practice. Representing a compressed copy as the original is not.
Privacy of GPS Data in SRT Files
DJI SRT files contain precise GPS coordinates. When sharing footage or SRT files publicly, consider whether the GPS data reveals sensitive location information:
Home or work locations: If the drone launched from your home or office, the GPS data reveals that address.
Client properties: If you filmed a client’s property, GPS data identifies it precisely.
Restricted areas: GPS data revealing flight near restricted airspace could be legally sensitive.
Dive sites, hunting locations, or other sensitive natural resource locations: Precise coordinates of these locations may be commercially or personally sensitive.
For footage shared with general audiences where GPS data is not relevant, stripping SRT files from sharing (without deleting them from your archive) is appropriate. For documentation purposes where GPS data supports the record, preserving SRT files is essential.
Color Grading DJI Footage Before Compression: A Practical Overview
For drone pilots who record in D-Log or D-Cinelike and want to produce well-graded delivery footage, understanding the basic color grading workflow prevents common mistakes at the compression stage.
Why Grade Before Compressing
Compressing D-Log footage without grading produces a compressed file that looks flat and washed out. This is not a compression problem; it is a color science issue. D-Log footage is designed to look bad until graded. Grading applies the tonal and color transformation that makes the footage look the way the scene actually appeared to the human eye, with rich colors and appropriate contrast.
Applying color grading after compression is possible in theory but wastes the quality advantage of D-Log. The flat profile captures wide dynamic range in the uncompressed original. Compressing first, then grading, means the compression step applies to a flat-looking image and the grading step works on already-compressed data. The preferred workflow is: grade the original D-Log footage, then compress the graded output.
Basic D-Log Grading Workflow
For pilots new to color grading, the basic D-Log workflow in any editing application:
Apply a LUT (Look-Up Table): DJI provides official D-Log to Rec.709 LUTs for each camera model on their website. A LUT is a preset color transformation that converts D-Log to a standard color space in one step. Apply the appropriate LUT for your camera model.
Adjust exposure and white balance: After applying the LUT, make exposure corrections (the footage may be slightly over or underexposed) and white balance adjustments (color temperature and tint) to achieve accurate, natural-looking color.
Apply creative look (optional): If you want a specific visual style beyond natural color correction, apply additional creative adjustments or a creative LUT.
Export the graded sequence at high quality settings (not the delivery quality, but an intermediate high-quality master).
Compress the graded export using ReportMedic’s DJI Video Compressor or Video Resize & Compress tool at your target delivery specs.
This workflow applies compression once, to the final-looking footage, rather than compressing a flat intermediate and hoping it grades well afterward.
Using the General Video Compress Tool for Graded Footage
After color grading and exporting from your editing software, the output file is typically no longer specifically DJI format. It is a standard MP4 or MOV export from your editing application. For compressing this graded export, ReportMedic’s Video Resize & Compress tool handles standard video files from any source, complementing the DJI-specific tool for footage that has gone through an editing and grading step.
Frequently Asked Questions
Why is my DJI footage so large even at 1080p?
DJI cameras record at much higher bitrates than standard delivery requires, even at 1080p resolution. While 1080p YouTube content might stream at 4-8 Mbps, a DJI camera recording 1080p might use 50-100 Mbps. This difference in bitrate, not the resolution itself, is why the raw files are so large. Compressing with ReportMedic’s DJI Video Compressor reduces the bitrate to delivery-appropriate levels, dramatically shrinking file size while preserving excellent visual quality.
What happens to my SRT telemetry file when I compress DJI footage?
Standard video compression produces an MP4 output file without the SRT data. The compressed video file does not contain the GPS and telemetry information from the SRT. To preserve this data, keep the original SRT file alongside the compressed MP4 in the same folder. Any application that reads DJI SRT data (GoPro Quik’s DJI-compatible features, DJI’s own software, third-party telemetry overlays) will find it there. The SRT file is a small plain-text file that takes up negligible storage space.
My DJI footage is in D-Log and looks flat. Should I compress it as-is?
No. D-Log footage is intended for color grading workflows, not direct delivery. Compressing D-Log footage without grading produces a compressed file that still looks flat and desaturated. The correct workflow is to color grade the D-Log footage in editing software first, export a graded master, then compress that master for delivery. If you need to archive the original D-Log footage before grading, compress it at high quality settings and label it clearly as ungraded flat profile material.
Can I compress DJI footage in the browser without uploading it to a server?
Yes. ReportMedic’s DJI Video Compressor processes footage entirely locally in your browser using WebAssembly-based encoding. Your footage never leaves your device. The GPS coordinates embedded in DJI footage, the visual content of the flights, and any sensitive location or property information in the video stays on your machine throughout the entire compression process.
What resolution should I compress DJI footage to for different uses?
For social media and general web sharing, 1080p H.264 provides excellent quality with manageable file sizes, typically 3-8 MB per minute. For YouTube, upload at 4K if your source is 4K, as YouTube maintains better quality for 4K content. For client delivery, confirm requirements and default to 4K H.264 at high quality when unspecified. For personal archival, 4K H.265 at high quality preserves maximum quality with better storage efficiency than H.264. For email sharing under 25MB, 720p at medium quality typically achieves the target.
How do I compress DJI slow-motion footage correctly?
DJI slow-motion footage is recorded at a high frame rate (60fps, 120fps, or higher) for playback at a lower frame rate to create the slow-motion effect. When compressing slow-motion footage, set the output frame rate to 30fps (or your intended playback frame rate) if you want the slow-motion effect preserved in the compressed output. The slow-motion works because the many frames captured at high speed are played back slowly. If you want the footage to play at normal speed (not slow motion), output at the original high frame rate.
Does compressing DJI footage affect its use as legal or insurance documentation?
The evidentiary value of compressed drone footage depends on the context and jurisdiction. In general, maintaining original unmodified files alongside clearly labeled compressed copies is the appropriate practice. Consult with legal counsel if drone footage may be used in proceedings where the integrity of the recording is subject to challenge. For insurance documentation, contact the insurance company to confirm their requirements for video evidence quality and format before compressing.
What is the difference between DJI’s H.264 and H.265 recording modes for compression?
H.265 source footage can produce smaller compressed output at equivalent quality than H.264 source footage, because both the source and the output can benefit from H.265’s efficiency. When outputting in H.264 from an H.265 source, the conversion introduces a transcoding step. The practical difference for compression is small: the output quality and size are primarily determined by the output settings, not the source codec. For archival, maintaining the original codec in the output (H.265 in, H.265 out) avoids unnecessary transcoding.
Can I compress drone footage on a Chromebook?
Yes. ReportMedic’s DJI Video Compressor works in Chrome on a Chromebook as it does on any other platform. Processing time may be longer on lower-specification Chromebooks due to less powerful CPUs, but the tool functions correctly. For large DJI files (multiple gigabytes), allow extra processing time compared to higher-specification laptops and desktops.
How can I tell if my compressed DJI footage is good enough quality?
After compression, open the compressed file and watch it at full resolution on your primary display. Check: overall sharpness and detail across the frame, sky gradients and smooth areas for banding, water and complex natural textures for blocking, color accuracy (especially important if footage was graded before compression), and audio quality if applicable. If any area shows visible artifacts (blocking, banding, smearing) that are not in the original, increase the quality setting and recompress from the original. A well-compressed DJI file should look essentially identical to the original at typical viewing distances.
Key Takeaways for DJI Drone Compression
DJI footage is engineered for production workflows, not direct delivery. Compression is not optional for any drone pilot who shares, archives, or delivers footage. It is a standard step in the workflow.
The color profile decision determines your compression workflow path. Standard color footage compresses directly for delivery. D-Log and D-Cinelike footage requires grading before delivery compression.
SRT telemetry files are small, valuable, and easy to maintain alongside compressed video. Keep them unless you have a specific reason to discard them.
ReportMedic’s DJI Video Compressor provides browser-based, privacy-first compression that keeps your footage, your GPS data, and your location information on your device. For general video compression beyond DJI-specific needs, ReportMedic’s Video Resize & Compress tool handles any input format. For splitting long flights before compression, ReportMedic’s Split Video tool extracts the segments you need. For combining multiple clips before compression, ReportMedic’s Merge Videos tool joins them cleanly.
Your original files contain everything the drone captured. The compressed copy is what you share with the world. Protect one, optimize the other.
Explore all of ReportMedic’s browser-based tools at reportmedic.org.
Post-Compression Quality Control for Drone Footage
A compressed drone file that looks fine on your editing monitor may reveal problems on different displays or at different zoom levels. Building a consistent quality control routine prevents distributing footage with compression artifacts that damage professional reputation.
The Four-Area Review
When reviewing compressed DJI footage, focus your attention on four specific areas that reveal compression problems most readily:
The sky: Look for banding (visible tonal steps in gradient areas) and noise. Clean compression produces smooth sky gradients. Insufficient bitrate shows visible steps.
Distant ground detail: Look for blocking (square artifacts in fine texture areas). Distant fields, city grids, and forest canopy reveal blocking quickly.
Moving elements: Any element moving through the frame (vehicles, water, wind-blown vegetation) shows temporal artifacts when compression is insufficient. Motion blur should look smooth; jerky or blocky motion during movement indicates a bitrate problem.
Hard edges on structures: Buildings, roads, and geometric structures have sharp edges that reveal ringing (light or dark halos along edges) and aliasing when compression is aggressive.
Playback on Target Devices
Always preview compressed drone footage on at least one device that represents the viewing context:
For social media content: view on a phone at typical scroll-stop resolution
For YouTube: view in a browser at full screen, simulating desktop viewing
For client delivery: view on the largest display you have access to
For presentation use: view through the projector or display that will be used
Problems that are imperceptible on a 27-inch monitor at 50% zoom become obvious on a 65-inch TV at full resolution.
The Side-by-Side Test
For any compressed footage where quality is uncertain, open the original and compressed files simultaneously and compare specific sections directly. This comparison makes artifacts visible that might be dismissed when reviewing the compressed version alone.
Building a Sustainable DJI Compression Workflow
The goal of a workflow is consistency and repeatability without requiring active decisions at every step. A well-designed workflow becomes automatic.
Define Your Standard Output Specifications
For each type of DJI content you regularly produce, define a standard output specification in advance:
Resolution and frame rate
Codec and container
Quality level or target bitrate
Audio encoding (if applicable)
Naming convention for output files
Document these specifications and refer to them when setting up each compression job. Consistent specifications produce predictable results and make quality review easier because you are comparing against a known standard.
The Pre-Flight and Post-Flight Checklist
Before every flight:
Format SD card in-camera after confirming previous session is safely backed up
Verify recording settings match the project specifications
Check available card space against planned recording time
After every flight:
Transfer all footage and SRT files to permanent storage before any other action
Verify transferred files open and play correctly
Back up raw footage to secondary location
Compress according to standard specifications for the session type
Label all compressed files with clear project and session identifiers
Batch Consistency for Long Projects
For projects spanning multiple sessions over weeks or months (construction progress, agricultural monitoring, environmental documentation), compression consistency is a quality requirement, not just a convenience. When comparing footage from different sessions side by side, inconsistent compression settings create visual differences unrelated to actual changes in the subject.
Keep a project log that records for every session: recording date, SD card used, raw file names, resolution and frame rate recorded, compression settings applied, output file names and sizes, and SRT file status.
The ReportMedic DJI Tool Ecosystem
For complete drone footage management from capture to delivery, the ReportMedic tools work together as an integrated browser-based workflow:
DJI Video Compressor - The primary tool for DJI footage compression. Handles DJI’s H.264 and H.265 formats with DJI-specific presets, processes locally in the browser, keeps your GPS data and visual content on your device.
Video Resize & Compress - The general-purpose tool for any video format. Use this after editing and grading steps produce a non-DJI-native export file, or for compressing DJI footage from a source that has been modified from its original format.
Split Video into Clips - Extracts specific segments from a longer flight recording before compression. Use when you only need portions of a flight rather than the complete footage, or when different segments require different compression settings.
Merge Videos / Join Clips - Joins multiple clips into a single file before compression. Use when multiple separate clips represent a single continuous presentation or when assembling highlight clips into a reel before compressing.
All four tools operate in any modern browser without installation, without server uploads, and without account creation.
Explore the full suite of browser-based tools at reportmedic.org.
A Final Word on Drone Footage and Its Value
Drone footage captures perspectives that were once available only to film productions with helicopter budgets. The sweeping aerial reveal of a coastline at sunrise, the smooth circular orbit around a mountain summit, the descending approach through a forest canopy. These shots are remarkable because they are genuinely inaccessible to any camera that stays on the ground.
That visual value deserves to be preserved through the compression step rather than degraded by it. Compression done well produces a file that is shareable, archivable, and platform-ready without sacrificing the visual quality that made the footage worth capturing.
The approach is straightforward: understand why DJI files are large, decide what quality level the use case requires, apply the minimum compression necessary to meet that requirement, verify the output against the original, and keep the original safe.
ReportMedic’s DJI Video Compressor provides the browser-based tool to execute this workflow with full privacy, no installation, and no complexity. Whether the footage is for a client, for social media, for an archive, or for documentation, the result is a compressed file that works where it needs to work and looks the way it should look.
The drone is a remarkable instrument. The footage it produces deserves equally thoughtful handling on the ground.
Quick Reference: DJI Compression Settings by Camera and Use Case
Different DJI cameras and use cases call for different settings. Here is a practical reference covering the most common combinations:
By Camera Type
DJI Mini 3 / Mini 4 Pro (entry-level drone) These cameras record 4K at up to 100fps with H.264 or H.265. Source files are large relative to the camera’s consumer positioning. Typical compression targets: 1080p H.264 for social sharing, 4K H.265 at high quality for archival. These cameras produce footage with good quality that compresses efficiently.
DJI Air 3 (mid-range consumer/prosumer) Air 3 records 4K at up to 100fps and 4K 10-bit in D-Log M. The 10-bit D-Log M footage is the most versatile for color grading workflows. For direct delivery from Standard color footage, compress to 1080p or 4K H.264. For D-Log M archival, compress to 4K H.265 at high quality after grading.
DJI Mavic 3 Series (prosumer) The Mavic 3 and Mavic 3 Pro offer up to 5.1K recording in H.264 and H.265, with D-Log M available at high bitrates. The higher source resolution provides downscaling headroom: 5.1K source compressed to 4K output yields sharper 4K than a native 4K recording. For professional delivery, 4K H.264 at high quality from the 5.1K source is the standard.
DJI FPV / Avata (FPV and immersive drones) FPV footage is characterized by extreme camera motion, high-speed flight, and wide-angle or fisheye perspectives. The constant camera movement creates high temporal complexity that requires adequate quality settings. For social sharing, 1080p at medium-high quality. For archival, 4K at high quality.
By Platform Target
Instagram Reels / TikTok: 1080p vertical (1080x1920) or square (1080x1080), H.264, medium quality, under 500MB per clip
YouTube (standard upload): 1080p H.264 at 8-12 Mbps, or 4K H.264 at 35-45 Mbps for 4K content
Vimeo: 1080p H.264 at 5-10 Mbps, H.265 supported for smaller uploads
Client delivery (standard): 4K H.264 at high quality, match source frame rate
Email attachment: 720p H.264 at medium quality, target under 20MB per clip
Personal archive: 4K H.265 at high quality, approximately 1-3 GB per 10 minutes
Troubleshooting Common DJI Compression Problems
Compressed File Looks Washed Out
If the compressed file looks faded and desaturated, the source footage was recorded in D-Log, D-Cinelike, or another flat color profile. The compressed output correctly represents the flat source. The solution is not to recompress with different settings but to apply color grading to the source footage in editing software before compression. Export the graded footage and compress that export.
Compressed File Has Sky Banding
Visible stepped tonal transitions in sky areas (banding) indicate the encoder had insufficient bitrate to represent the smooth gradient. The solution is to increase the quality setting and recompress from the original. If banding persists at high quality settings, the source footage may already contain subtle banding from either the original recording or from an overly aggressive color grade.
Audio Is Out of Sync After Compression
Audio sync drift in compressed DJI footage is uncommon but can occur, particularly when changing frame rates during compression. If compressing 60fps footage to 30fps, ensure the compression tool handles the frame rate conversion correctly. For footage where sync is critical, avoid frame rate changes during compression and handle any frame rate conversion in editing software before the compression step.
File Is Still Too Large After Compression
If the compressed output exceeds your file size target, work through these adjustments: reduce the quality setting by one or two steps, reduce resolution to the next tier (4K to 1080p, or 1080p to 720p), reduce frame rate for high-fps content, trim the clip to essential content only. Apply changes incrementally and preview quality after each adjustment to find the minimum compression that meets the file size target.
Compressed File Fails to Play on a Specific Device
Format incompatibility is the most common cause. H.265 compressed files may not play on older devices without hardware H.265 decode support. Recompress to H.264 for the specific device. If the device is very old, try reducing resolution to 720p and using H.264 with a baseline or main profile setting.
The Two Numbers That Guide Every DJI Compression Decision
Every compression decision for DJI footage ultimately comes down to two numbers in tension with each other: the file size you need to achieve and the quality level you need to preserve.
The file size target is determined by your delivery constraint: email attachment limit, platform upload limit, storage budget, or bandwidth requirement. This number is usually specific and non-negotiable.
The quality level is determined by your use case: how the footage will be viewed, on what size display, by what kind of audience, for what purpose. This number is a judgment call that involves understanding both the technical characteristics of the footage and the viewing context.
ReportMedic’s DJI Video Compressor gives you direct control over both dimensions. Resolution selection controls the primary quality ceiling. Quality slider controls the bitrate allocated within that resolution. Adjust one, then the other, preview the result, and find the combination that serves both the quality requirement and the file size constraint.
Drone footage deserves to be shared. The compression step is what makes sharing possible without sacrificing the visual quality that the flight and the drone camera worked to create.